Manage Extract Profiles
- DarkLight
Manage Extract Profiles
- DarkLight
Article Summary
Share feedback
Thanks for sharing your feedback!
This article is specific to the following platforms - Snowflake - Redshift - BigQuery.
Overview
An extract profile is an API profile that will invoke an external API and return unflattened or nested data in the form of a single-column JSON structure.
Please Note
Make sure you use a compatible JSON file. Other file types are not supported. The Manage Extract Profiles wizard only supports the receipt of, and sending of JSON objects. Errors will appear in this dialog if you do not use the correct file type.
Users must flatten (or un-nest) this data using the API Extract component, and either the Extract Nested Data component, or the Nested Data Load component. These components have a number of properties that are cloud data warehouse (CDW) dependent. You will find properties tables for each CDW.
This document describes how to create and manage an extract profile, configure a new endpoint for that profile, and use it with the API Extract component.
Getting Started
1. Click Project in Matillion ETL, scroll down, and hover the mouse over Manage API Profiles, and click Manage Extract Profiles.

2. In the Manage Extract Profiles dialog, click to add a new extract profile.

3. The Add Extract Profile dialog will be displayed. Specify a Profile Name for the new extract profile. For our example, we name the profile Docs_Demo. Then, click Setup.

4. The Configure Extract Profile dialog will load. Please note, when an extract profile is first created, there will be no endpoints listed. The area to the right of this wizard is where endpoints will be displayed once they have been created. To setup a new endpoint, click New Endpoint. The Configure Extract Connector wizard will be displayed.

The following sections in this guide describe the Configure Extract Connector wizard.
1. Source Details
The first step in the wizard requires basic source information:
| Property | Type | Description |
|---|---|---|
| Endpoint Name | String | This is a data source and should reference the name of the newly created endpoint. |
| Description | String | This property is optional—for reference purposes only—and should be a human-readable description of the endpoint. |
Error
An error will occur if an endpoint is named any of the following:
- Datasourcelists
- Environments
- Versionlists
- Versions
Type the Endpoint Name and Description information in the fields provided. Then, click Next to progress to Endpoint Configuration.

2. Endpoint Configuration
The second step of the wizard requires information about the intended API call.
1. Specify the method using the first drop-down menu, situated on the left-hand side. Select either GET or POST.

2. Enter the intended endpoint URI in the field provided.

Auth
3. After specifying the endpoint's URI, just below, there will be a list of tabs. Auth will already be open. Toggle the authentication button to ENABLED if authentication is required.

4. Choose the authorization type in the drop-down menu provided, then enter the correct credentials in the relevant fields, situated to the right of the aforementioned drop-down menu.

Params
5. Adding a parameter is optional. This allows the user to specify any parameters to validate the API call. Click Params, situated to the right of the Auth tab.

6. To add a new parameter, click . Pass a Parameter Name, Value, Type, and specify whether the parameter is a Constant, or not.

Body
7. Adding a body of the request is optional. Click Body, situated to the right of the Params tab.

8. To add content here, place the cursor in the body editor, and enter the relevant details.

Response
9. Click Response, situated to the right of the Body tab. Here, paste a sample response into this field, and Validate it to create a profile without a live endpoint.

10. Alternatively, click Send. The Response tab is automatically brought into view, and the API call response is displayed.

Please Note
Both methods described above will result in the following message being displayed for validated API calls:
JSON File validated successfully with no errors.
Log
11. This is the final tab, situated to the right of the Response tab. Click Log to view your API request and response data.

In summary, after specifying the method, URI, any required elements in the tabs described above, and clicking Send, the Response tab will be displayed. Upon validation, click Next. This will display the Response Configuration step of the Configure Extract Connector wizard.
3. Response Configuration
On the third step of the wizard, users can view the structure of the data returned from the API. To configure the Response Configuration page, read Manage API Profiles Wizards.

Click Next.
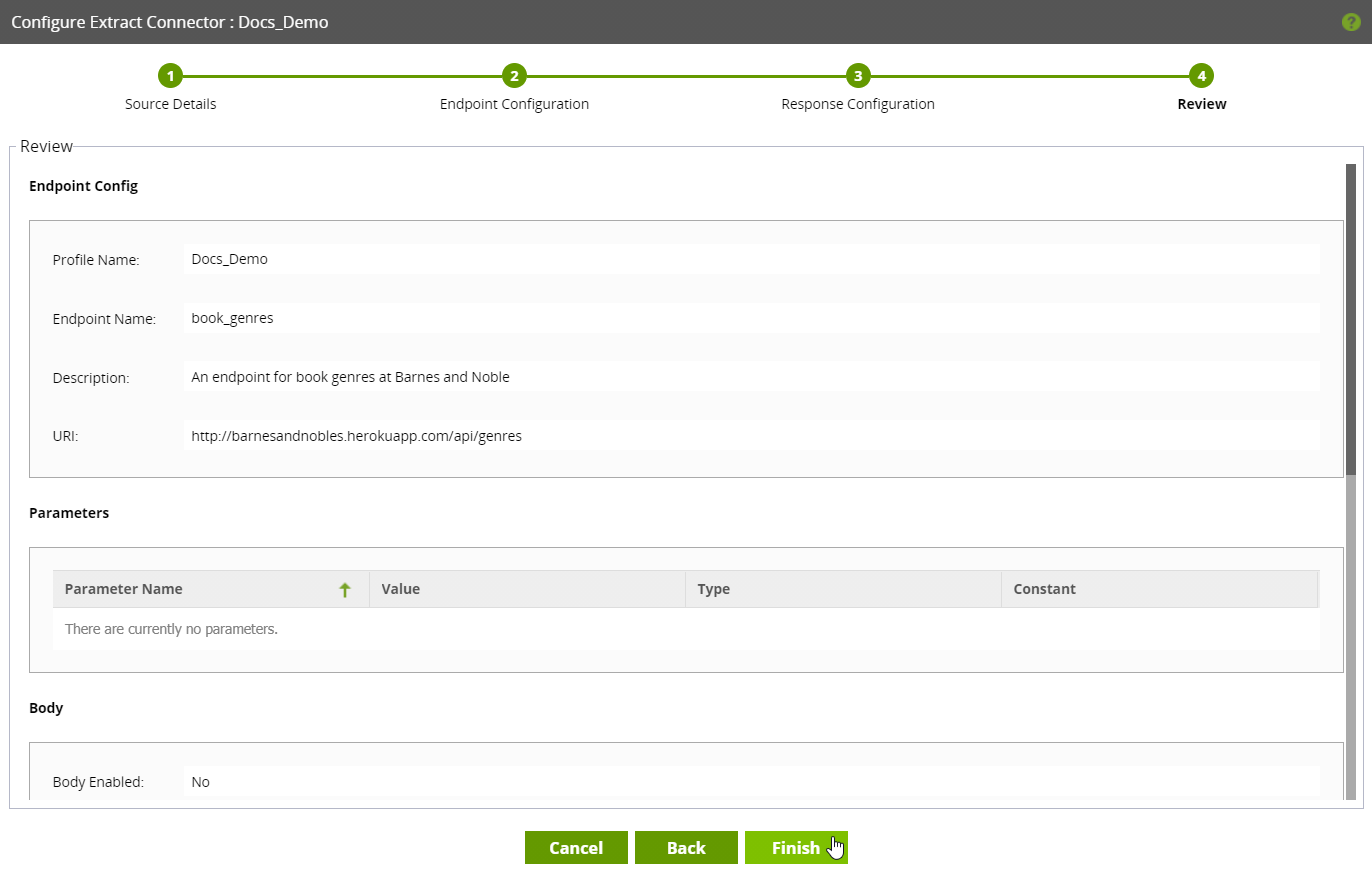
4. Review
The final step of the wizard is for reviewing the configuration of the new endpoint. Publishing the configuration will make the data source immediately available for the user's API extract profile.
Please Note
The following fields are read-only and are intended for review purposes.
Click Back to make changes. Otherwise, click Finish.
API Extract
In Matillion ETL, bring the API Extract component onto the canvas.

Within the component's properties, click into the API property, and select the new API extract profile. Then, click into the Data Source property, and select the data source (the endpoint name).
Custom Parameters
In certain instances, you may need to specify an authorization parameter that is not a bearer or username/password. To do this, in the Params tab, specify a parameter called Authorization:, supply the value, and set the Type as Header. For more information, see the image below.
